The Art of Paper Filigree

This blog is to celebrate the things I enjoy making. This includes quilling art, crafts, and cooking recipes and ideas, as well as some musings. I enjoy sharing ideas. By all means, if you want to borrow an art idea, go for it. But please, make it your own; don't just copy. If you've never heard of quilling art, I hope this introduces it as an art form and possible hobby. And I hope the pages to the right of the quilling blog posts offer up information, ideas and inspiration.

Enjoy your visit! If you have questions or comments, by all means share.

Saturday, February 18, 2023

New Work

 I've taken an interest in Steampunk and love exploring designs that incorporate that. I did this artwork a couple of years ago.  It's called "The Flower" and it's done in a style that incorporates crystals, quilling art and steampunk style. 


And just recently I decided to make a steampunk clock and this is what I came up with. 


And I'm now working on more mixed media art, some Steampunk, some Quilling Art. I'll be posting more in the near future. Hope you like what I've done. 

Added: just finished the steampunk style octopus I've been wanting to do. Leaving room for the seahorse I'm just starting. Later!


Tuesday, January 5, 2021

One More Commission

I had one more request for quilling art for a Christmas gift.... a fanciful butterfly.  I asked for the favourite colours and then went to work.  Here's what I came up with.  Unframed.


 Framed:


Fortunately the client love it.  

Tuesday, September 8, 2020

The Cardinal

Well, yes, I am still quilling, just not as much as I used to.  I've taken some time out to make masks in this pandemic, but I've had a couple of requests, so here's what I just made.

I have another request on the go now, will post it when it's done!  Hope all is well with everyone out there!


Saturday, December 7, 2019

Christmas Sale!!

So somehow when I posted an ad on Facebook for my upcoming sale, they posted the link to here. Okay then!  So the upcoming sale is at Norman's Garden Gallery in Midland, Ontario, Canada!  We'll be there Saturday, December 14th roughly between 10 and 3.  Not only does this store have an amazing array of gift items and gift ideas, this little sale gives you one more crack at our great artisan jewellery, as well as other art, craft and gift items!  Hope to see you there!


Monday, February 16, 2015


My Latest Work...
Ok, so I've tried several times to upload new quilling art pictures to my blog, but they've "improved" this upload to the point where it just won't work for me. 


It's a shame.  It used to work, and really quite easily.  Now it won't.  There's just this annoying little ball turning different colours... endlessly, and nothing happening.  And there isn't much point to an art blog that won't upload images of my artwork.


I will leave the rest of the blog here that uploaded prior to their latest "fix," including the butterfly tutorial which I hope people will continue to discover.  But for those who want to see my latest work, and there have been several new pieces, please visit my Quilling Art page on Facebook.  My pictures will still upload there.


The URL is: https://www.facebook.com/WendakaisArt?notif_t=page_new_likes


I hope to see you there.  :)

Sunday, October 13, 2013

More Butterflies

Yes, I've been busy making all kinds of things.  But since I sold all my butterflies, I decided I had to make more.  I came up with a new idea for them: butterfly in a bottle.  Here's my first one. 

And I needed another framed one, so this is what I came up
with.

These are made differently.  I used smaller design pieces to make the monarch in the bottle.  The framed one is made just as the butterfly is in the butterfly workshop posted in this blog.  (Look around... it's here somewhere!)


I used a conventional matting, decorating it as well, so that instead of creating a background, I just used a piece of carding in a colour I liked and mounted the butterfly on a dried twig.  Yes, I still don't like giving up the picture so abruptly at the frame, so it is painted as well.  :)

Fun!  I'm also busy working on some new cards.  But that's for another day.  :)  Onward!


Saturday, March 23, 2013

Blue Jay!

Last Spring a wee baby squirrel came 'round our place, apparently looking for his mama.  She had been killed by a car across from the neighbour's place.  This poor wee baby squirrel kept going up to anyone, including our cats, as if to ask, "are you my mama?"

We kind of took care of him, putting out sunflower seeds for him to eat.  We didn't know if he'd survive long without any apparent fear for creatures that would harm him, but somehow he did. 

Now he has lots of squirrelly friends, probably in part because we still put out food for him.  Squirrels that have human friends with food are probably pretty popular, so we figure his friends are teaching him squirrelly ways.

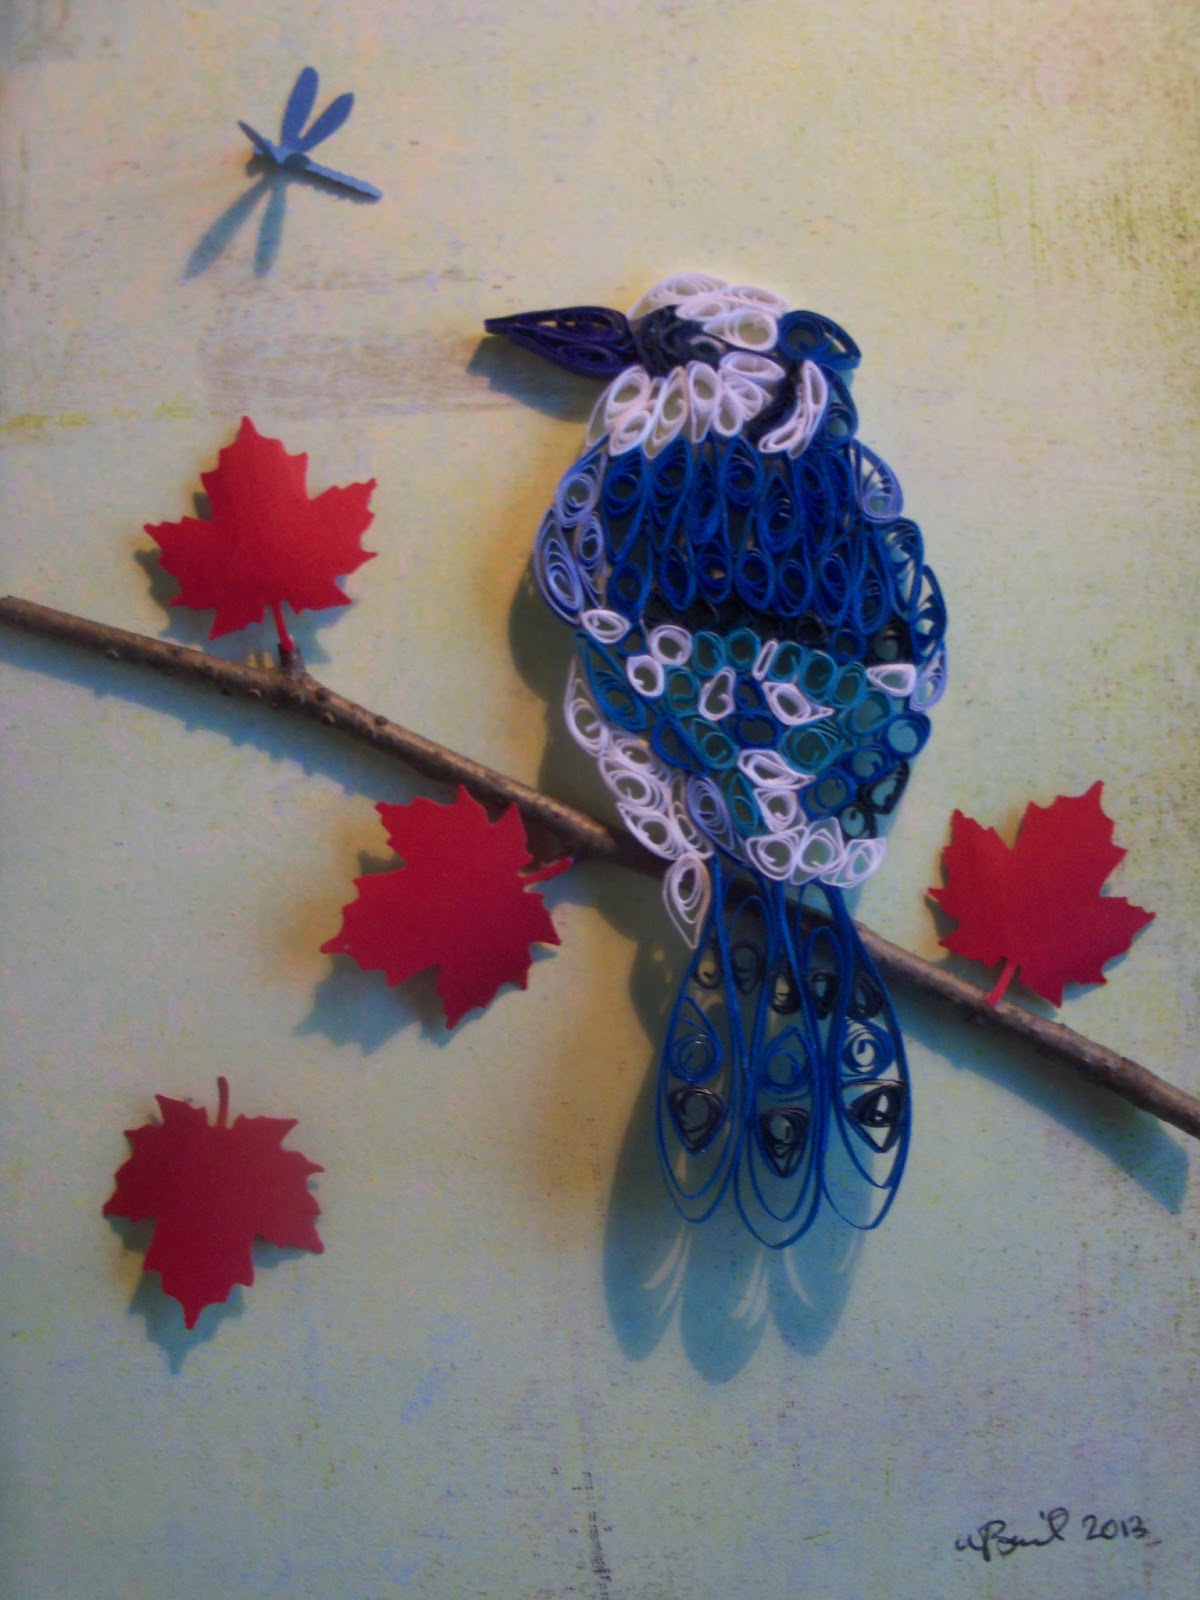
We put out mostly unsalted peanuts in the shell for them, but of course, it isn't only the squirrels taking advantage of this.  There's a flock of blue jays living in the trees across the road, and when we put out those peanuts, they take turns stealing a share for themselves.  Jays are related to crows, and my, they can be aggressive and raucous birds for sure!  But hey, they are also very beautiful.  Just had to make one in quilling art. :)

Sunday, February 17, 2013

Orca!


I've been working on some small stuff, but felt the need to start in on some new pictures. 

Been wanting to create an orca, so here she is.  :)

Yes, I'll be framing it, but I want to paint the frame with some white and blue first.  I really don't like to give up the picture so abruptly at the frame.

;)

Saturday, November 17, 2012

Some new work!

Yep, still here, working away.  Time for those Christmas Craft sales.  Two this weekend.. just little ones.  Not looking so much for making money as for networking with other crafters.  Hey, it's all good.  I don't have as much new stuff as I wanted to, but here's yet another dragon!  My, but they are popular.  This one is Dagwood, and he just loves toasted marshmallows!  :)

And some new holiday cards and tags of course, with some fave designs!
                                                                                                                      
As well as some attempts at new designs!  :)


Tuesday, July 31, 2012

A New Guitar

This is my latest guitar.  I chose aqua pearlized quilling strips for it, using black strips and silver paper for the finishing touches, then black, red and aqua paper for the added musical notes.   I'm always reluctant to just let my pictures end so abruptly at the frame, so once again I used craft quality spray paint to add a little colour there too... blue on black.

Sunday, July 15, 2012

Lately?

So, what have I been doing lately?  Someone
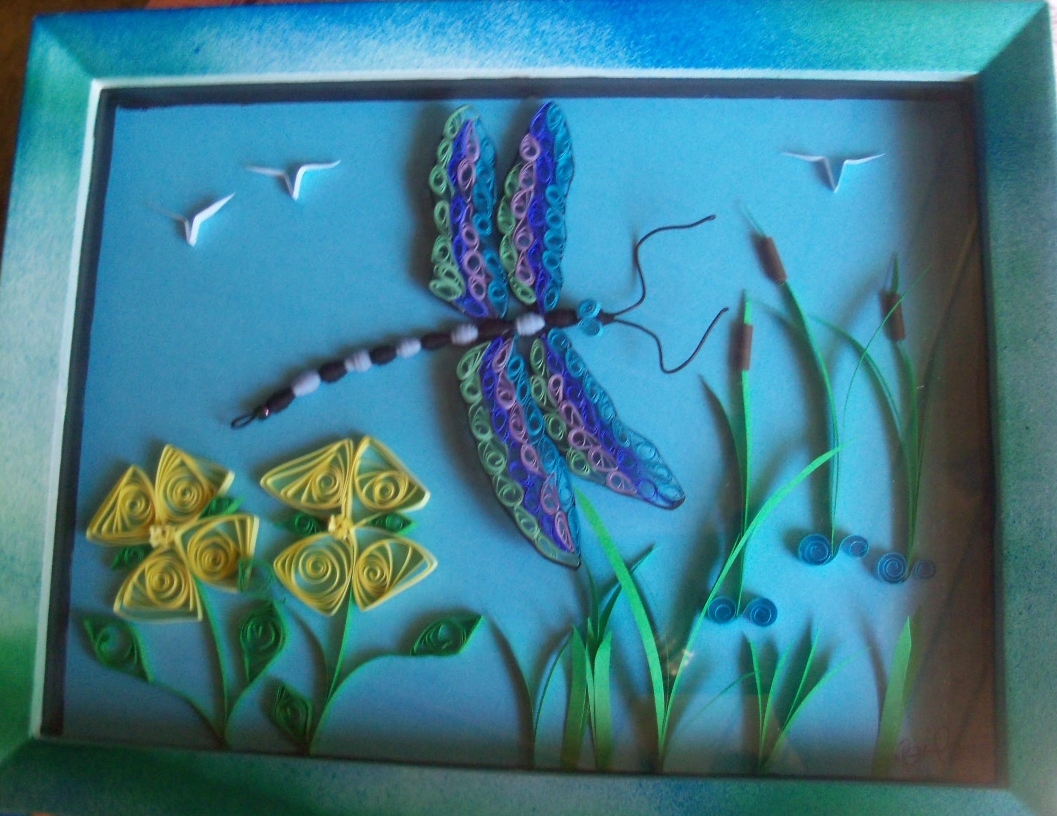
mentioned that a dragonfly would be nice, so I did one.  I used glistening paper, all different colours for the wings.  I wish I could find some deeper shadowbox frames though... I could do more with something like this if I had more room.  I may have to start making my own frames. ;p
I just love this little froggy poem... I've made one before with a different frog pattern that I devised myself.  This time I tried the 3D, curly limbed pattern out of a quilling art book.  It's interesting anyway!
Another vendor at the market I'm doing this year asked me if I could make an owl.  "Sure," I said.  She really liked it. :)  And of course, I've kept the cards comin', recently figuring out how to create a likeness of an echinacea flower.  I really like to combine photos with quilling art on my cards, and it seems as if other people like it too.  :)  Most of my cards are blank, all purpose, but the card on the right is a wedding card.  So, busy, busy!  :)
I

Tuesday, February 7, 2012

Pheasant Under Grass


Hehe... sorry... couldn't resist.

This is the first of what I envision as a series of birds in the wild. This piece is a mixed media effort. I used milk weed seeds for the bird's tummy, added actual pheasant feathers to the wings and to make the tail, and used wood chips, birch bark, twigs, and real dried grasses in the piece, to supplement the quilling paper.

I like it, and I'm looking forward to doing more. First though, I think I'll dabble in a little cave art. :)

Tuesday, January 10, 2012

DON'T LOOK if you're afraid of spiders!

I've always been fascinated with the legends of ancient cultures. They are colourful, often beautiful, and expressive of where we've been... and probably also where we're going.

I've also always been fascinated by spiders. Yes, the humble arachnid, the elegant 8-legged creature that has many people screaming in terror at the very sight of it. I can remember sitting under the picnic table when we went camping, watching the daddy-long-legs whilst the parental types set up camp. Not that long ago I had a five-legged spider crawl across my computer screen. I couldn't help wondering what its story was. Probably one of epic struggle and survival. I didn't give it further grief.

Particularly interesting are the legends of the aborginal peoples of Turtle Island..aka North America. The Grandmother Spider figured in the very creation of world.. she brought fire to the people, she created the stars in the sky from the dew on her web, and more. One popular legend is that of the dreamcatcher. It is a web that allows the good dreams in, and keeps the bad ones out. I thought of this when trying to come up with a way to make the spider's web. In this web I made red beads of quilling paper. In the one below, I remembered some antique mother of pearl buttons... these are made of sea shell of course. I thought them appropriately glittery.

I created the backgrounds with acrylic paint on paper I thought suitable. The spiders are quilling paper of course, to create a couple of mixed media pieces that are the same, and yet not, and that I really like.

And so, "She took a web she had spun, laced it with dew, threw it into the sky and the dew became the stars."

Tuesday, December 27, 2011

Gifts for Kids!!

Of course I did some quilling art for gifts, but I couldn't post it before now, because I didn't want those sweet girls peeking! ;o) So here's an idea I'll share now.... I asked my grandnieces for their favourite colour, flower and animal.


So here's Huberjinx the cat, the result of a preference for cats, the colour orange and lilies!


And here is Patrick the Panda, holding purple roses.... yes, the faves desired.


My other grandniece is too young to have decided yet just what her personal faves are, but her mom, my niece, sings her a pretty little song about playing with dragons in meadows...


And you know, I love making dragons. :)

Saturday, November 5, 2011

Giraffe!


An older gentleman bought Ezmerelda for his grandniece, whom he said is "a princess." He came to market with other family, including his sister, who later told me how much the little girl loved her picture. It's really cool to get positive feedback.

This lovely woman also likes my quilling art. She bought Freaky Fish and asked if I could make a giraffe. I said, "sure." And so I have. I hope she likes it!

So many more ideas to work on! :)

Tuesday, September 6, 2011

Ezmerelda is finished!

Yep, she's done. I placed my wee pink dragon in a flower garden, which apparently she just can't resist! Now I'm anxious to do another dragon. :)


While I was at it, I fixed up a piece for Remembrance Day. The background is actually a lovely green, but it doesn't really show that in the picture. The poem, of course, is In Flanders Fields.


And one day while I was also making chili sauce, I worked on some plaques. Chili sauce... quilling.... chili sauce.... quilling. It's a confusing life. ;o)


Only a month of market to go, so I've decided to not knock myself out with the preserves and worry about having some of "everything." When I run out, I do ~ as long as I'm left with enough for holiday gifts. I have so many ideas for quilling, I really want to be doing that. I'd love to do some holiday shows, just with the quilling. :) We'll see.

Monday, July 18, 2011

Busy, busy!!

Busy, busy! I'm champing at the bit to get back to Esmerelda. Have her background all ready, but I need to make up a bunch of very detailed pieces for her scene, because the joy of the dragon pictures is all the stimulating detail. In the meantime, I've had to keep replenishing my market stock. More cards, tags and even though I made 30 note clips, I'm going to have to make more.


And I had this commissioned piece to do as well. It's a really nice wedding invitation, which you can see, even though I blocked out the details. Basic white, black and red which lent itself to some classic roses. With other flowers, bells, hearts, etc., I think it turned out very well.


Sure hope the newlyweds like it!

And then, hopefully, back to Esmerelda!

Tuesday, May 31, 2011

This is My Box!

"What are you making again???" asked Hubby ~ again.

"A box," I replied ~ again. "A BOX.... B.O.X... box," I smiled patiently.


Geez..... ok, it might seem an odd thing to build, but I'm doing the market with paper products, and it's not only outside but in a location that's windy. Ever try to sell paper crafts in a big wind? Oy. I needed a box to be storage, carrier, wind-proof display... the whole shebang. But there is nothing like it available commercially that I can find. So, simple, I have to make it.


The last carpentry I did was the cabinet in the bathroom. It needed to be shallower than anything available commercially, so once again.... It's still waiting for doors. I need to make some cupboard doors for the kitchen cabinets too. One damaged one finally broke beyond repair. I priced them at the lumber store: $100. bucks a piece! For a 12 x 17 inch door? And I need 4 of 'em. $400. bucks?! Not happening. The lumber store had some tongue-in-groove pine boards on special. I bought some. $27. for enough to make cupboard doors. But then I needed this box and I started to eye those boards. Oy... gonna have to get more!


I chose a slightly warped old drawer bottom for the bottom of my box. I figured I'd manage with it. Heh. Ok, so I owe the swear jar a LOT of nickels, but I did manage. ;p


I drilled holes in the ends to take knotted macrame rope for handles, and I gave it its own bungee cord to hold the lid in place when not in use. Yes, I could have come up with something more sophisticated, but time is short and this gets it done. I mean, it was very frustrating waiting for the rains to stop when I wanted to get this done. I don't have a basement. I have to work out on the deck. Eeeerrrggg. Just in the nick of time, sunshine.


So, this is my box. I didn't put the dividers right to the back of the box so I can jam the lid right down in against the wind. Now all I have to do is add the signage to the inside of the lid telling folks what it is, what it's for and how much. Hope it works!

Sunday, May 29, 2011

This is Ezmerelda!


Ezzie is a dragon. Now the hard part ~ creating a fun and stimulating environment for her.


More to come!

Tuesday, May 3, 2011

How to Build a Butterfly ~ a Quilling Art Workshop


My mom made some really nice quilling art butterflies, and what I know about it I learned from her. So what I'm sharing is basically her technique. The butterfly to the left is one I recently made. The yellow butterfly below is one of my mom's.

The Wings: As you see, you start by making loops ~ 3 or 4 graduated loops deep, glued at one end, open at the other. Make 6 or 8 of these (it's up to you... it's your butterfly). Looks like Mom used 3 and I used 4 here. I used 7 to 9 inch pieces of 1/8th quilling paper for this. Experiment with a piece and see what works best for you, then try to make them uniform for the top wings. Then you need to make some more for the bottom wings. I made 6 ~ 2 each small, medium and large.


Put the loops together, then choose a secondary colour to add to embellishing it with frilly shapes. Mom favoured C scrolls, but I rather like lopsided hearts, pictured below. If you click on the pictures, they will get larger and you will see how I used the lopsided hearts between some of the wing loops. Of course, I also used C scrolls, teardrops, S scrolls, etc. Whatever you like. I have also put some double-colour teardrops inside the loops to create the "eye" affect on the wing. And I put some loose circles in there as well. You have to basically just keep going with the frilly bits until you're satisfied with wings.
Attach them with glue. If you don't want a flat butterfly, pin one wing to a quilling board and place something under the second wing to hold it at an angle while the glue dries.


The Body: I used a beading tool for this, which is much deeper than an ordinary quilling tool.

You need some black craft wire, a glass or plastic bead or two (Mom used two small beads; I used 1 medium one) and a sheet, or wide cut, of quilling paper. Cut the paper in a long triangle, point at one end, about 3/4 to an inch at the other. You'll need one for the body and at least one more smaller piece for the head, depending on how wide you're able to roll it. You can attach as many pieces as you need.

Glue the tip. You can adjust your paper "bead" by inserting a cocktail toothpick and shaping it the way you want it. This also makes sure the center is open to receive the wire. Cut a long piece of black wire and insert it through the head and body pieces, string on a bead, or two, to hold the wire in place at the tail, then re-insert the wire in the other direction. The pieces of wire at the "head"end will form the antennae. Shape it the way you want, make sure it's cut evenly. Run some glue down the underside of the body and between the pieces to make sure it stays together. Allow to dry while you roll two narrow bits of paper and glue to make the antennae tips. Glue these onto the ends of the wire.

Mount the body onto the wings, glue, and VOILA.


I hope this is helpful for those wanting to make their own quilling art butterfly. Another one I made, I chose lime green and lavendar as the colours. My teenage daughter said it was like "rock star meets old lady." I changed it to lime green and grape, but I still have that first wing and I still like it. Afterall, what's wrong with rock star meets ol' lady anyway? ;o) Back to work.